I have seen many laser cut maps for sale at farmers markets and gift stores, but given that I have access to a laser cutter though Northforge, I decided to make my own. The main guide I followed was this one , but it uses Adobe Illustrator, which I do not have a licence for.
I adapted the process to work using CorelDraw, which is the vector drawing software Northforge has, and also is the software set up to export to the laser cutting machines in the facility.
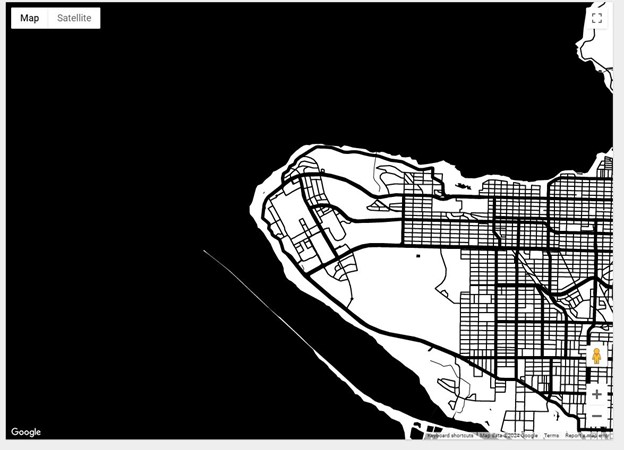
The initial steps of the process are the same. I opened snazzymaps.com, selected the “Epilog Laser – Maps (Thin Lines)” style and used the map to select my desired location (UBC in this case). I then zoomed in/out until I got a number of roads that looked good to me. Although I plan only to use the end of the peninsula, zooming in more would load the back alleys, cluttering the map. After that, I took a screenshot and saved it to my computer.
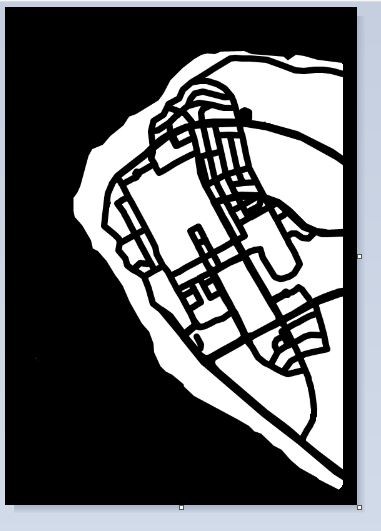
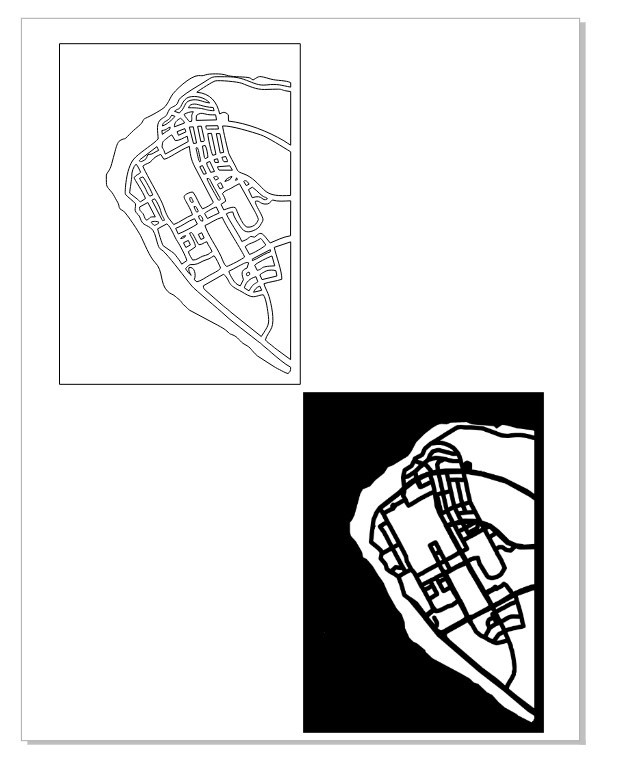
The second step was to open it up in MS paint to adjust the image. I cropped it down to size, added a black border around the image, and removed some small details which would not cut well. Note that black will be the wood that remains, while white sections will be discarded. This means that all of the black lines need to be connected, or else the piece will fall apart.
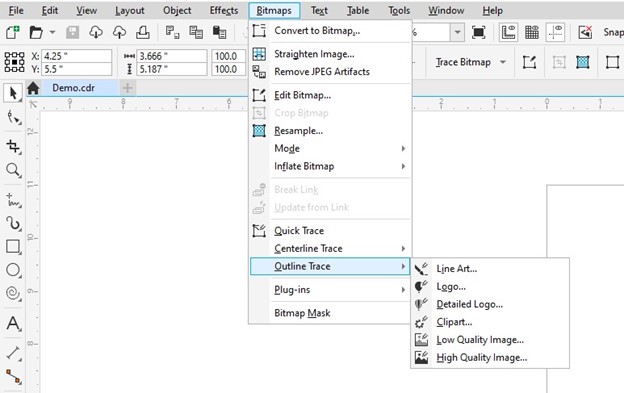
The next step was to import the bitmap image above into CorelDraw and use the vectorizing tools there to turn it into something that could be cut out. In CorelDraw, I used File > Import to open my JPG image into a blank document. I then selected the “High Quality Image” option from the Outline Trace tool.
This opens the PowerTRACE dialogue box. I selected the following trace settings, as well as selecting “Black and White” under the “Colors” tab. Note that I am removing the white color from the entire image. This is important, as otherwise, your lines will double up in the final image.
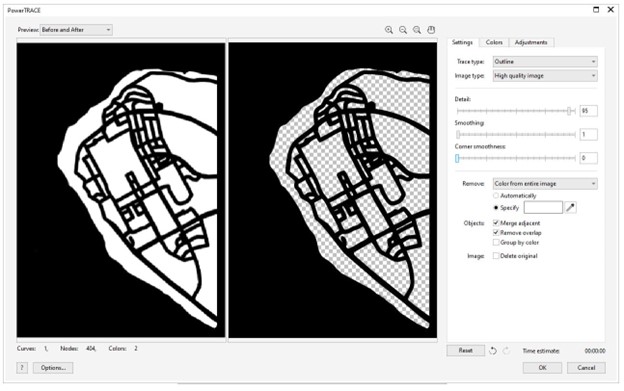
From there, I selected OK, which added the vector image to my document. I dragged the original JPG down to the bottom right corner and selected the vector image. I set the fill to “none”, and the outline to “hairline”, which flags to the Epilog Fusion laser cutter that these lines should be cut.
From here, I simply copied the map onto another document sized to the piece of 3mm thick plywood I used to print it on, set up my machine according to manufacturer specifications, and ran the print.
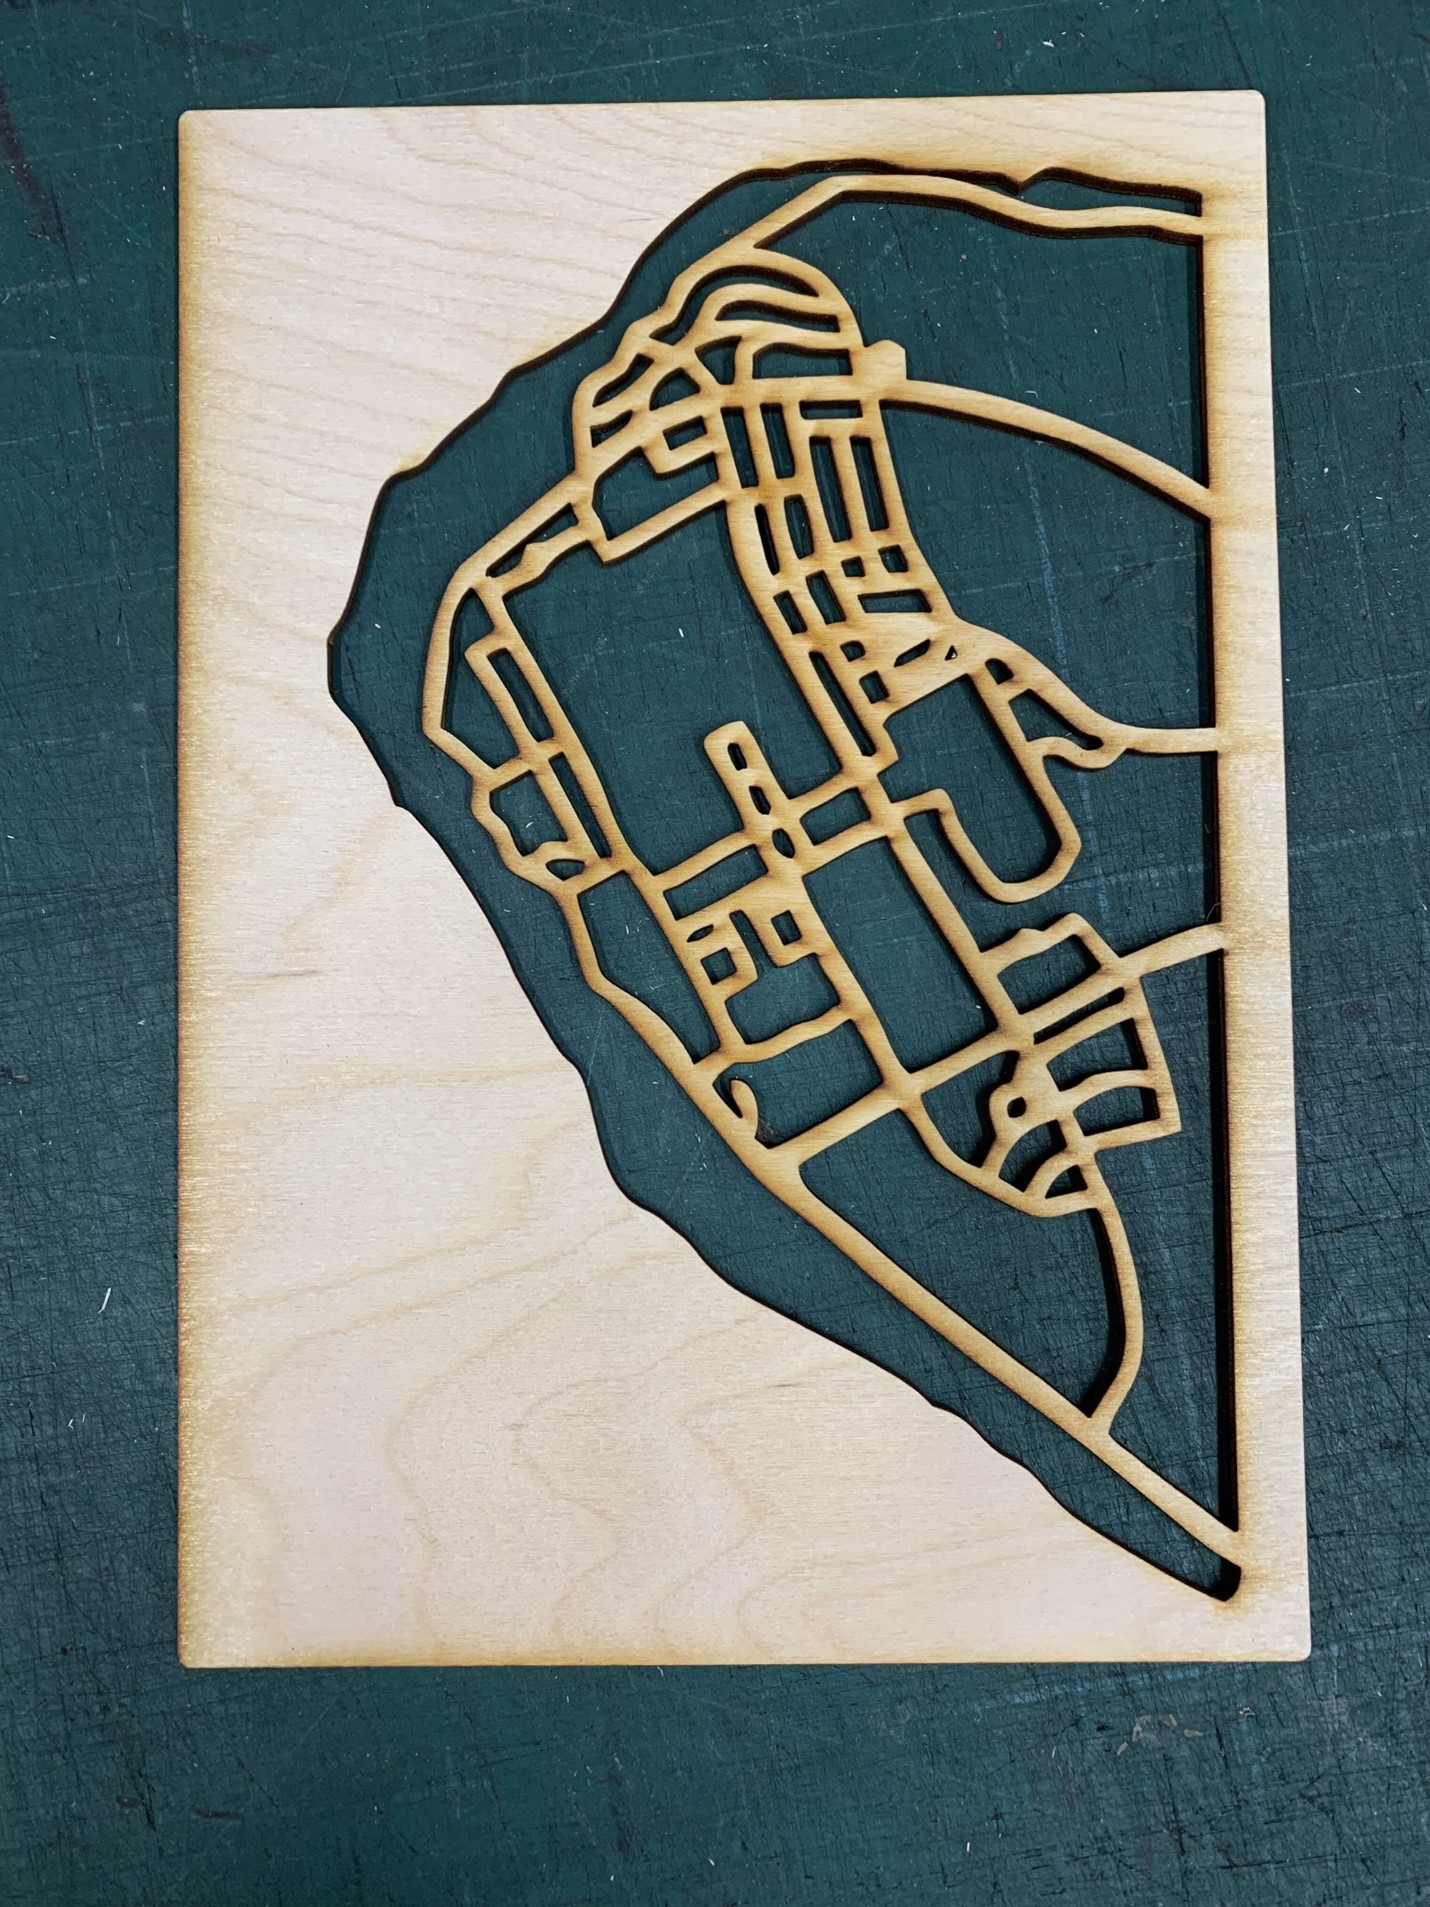
I decided that the bottom left corner was a bit barren, so I found a copy of the UBC logo online and pasted it onto the document. Then I put my already cut-out plywood back into relatively the same spot on the laser cutter and ran the engraving tool. It’s easier and more precise to run the engraving and cutting in the same print, but I didn’t want to waste another sheet of plywood.
I also cut out another piece of plywood to act as a backing and applied a bit of stain to add some contrast. I glued both of them together to create my final piece. It’s approximately 8”x5” and I’m going to hang it on my dorm wall
